Drying fresh flowers and using a range of crafts to create beautiful and decorative objects is a timeless art that never fails to amuse and challenge children. It’s a fantastic way to spark interest in nature and engage them in a project that needs great care with the delicate flowers, planning and design.
Table of Contents
How to Dry Fresh Flowers
First of all it’s important to remember that wild flowers are most beautiful if they are left in the wild. Instead, choose blooms from the garden or cut flowers for drying and pressing. Make sure you pick the flowers when they are still in their prime and choose a time when they are dry and free from rainfall or dew.
The two easiest methods for drying flowers at home are air drying and pressing. Both take a bit of time, so you’ll need to plan your projects to fit in with this and it’s a good chance to try and introduce kids to the virtues of patience!
Air dried flowers
Sort the flowers you want to dry into bunches of about 5 blooms, keeping different types and colours of flowers separate. This is a really good activity for younger children who enjoy sorting and matching objects into types and colours.
Tie the ends of the stems with string, tight enough to keep the bunches together but not tight enough to damage the delicate stems.
Suspend the bunches upside down with the string from a pole or rack. They must be kept somewhere dark and dry. A store cupboard is ideal. Make sure that the bunches don’t touch each other or anything else.
The flowers should be dry and ready for craft projects within 1 -3 weeks. To keep the flowers in good condition after drying, lightly spray them with ordinary hairspray.
Pressing Flowers
This technique for drying flowers suits smaller or ‘flatter’ flowers. Arrange the flowers on a piece of kitchen towel and sandwich another piece on top.
Place the flowers carefully between the pages of a heavy book and weigh down with more books. Make sure your flowers are arranged so they don’t overlap or touch each other. Again, it will take a few weeks for the flowers to dry completely.
You can also buy purpose built flower presses for this job but heavy books and kitchen towel are equally effective.
Craft Ideas for Dried Flowers
Dried flowers can be used in so many different craft projects. Here are some ideas you could try:
- Use pressed flowers to create beautiful nature collages. Treat the blooms carefully and finish the picture by gently applying a thin layer of PVA glue to preserve the masterpiece.
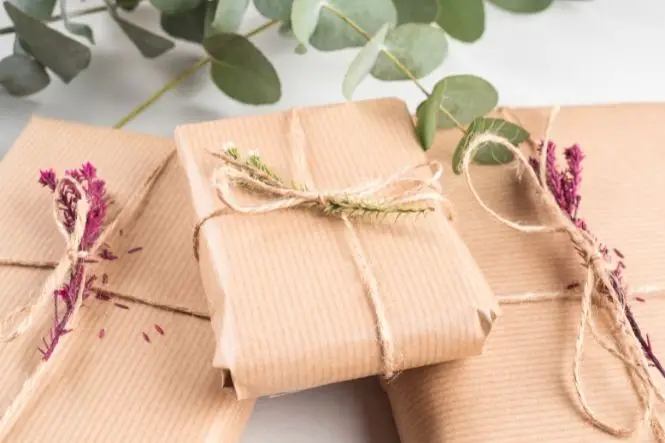
- Looking for a unique and beautiful gift? Paint a terracotta pot with bright colours and place a large lump of modelling dough or oasis (floristry foam) in the base. Create a pretty arrangement of air-dried flowers and finish with a raffia bow.
- Use flowers to decorate plain, white pillar candles. Start with a thin layer of PVA glue and carefully apply the dried flowers. Fix the arrangement with another layer of PVA glue and leave to dry.
- Dried flowers turn simple arts and crafts projects into something very special. Use them for homemade bookmarks, cards or stationery.
Drying flowers and using them for arts and crafts requires a steady hand, teaching younger children to work with natural materials and treat them with care. It involves using design skills and the end-result is very beautiful and satisfying.