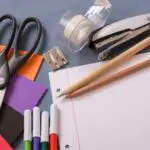
Everyone loves to use nice stationery or receive a special letter instead of an email. It’s even better if the stationery is homemade and hand-crafted. Making your own stationery is a good way to encourage kids to remember the often overlooked skill of writing a letter, thank you note or birthday invitation.
The shops are packed with all sorts of goodies to help you create unique and personal stationery but it doesn’t have to involve great expense, using just a few simple techniques and ideas. You can either make individual items of stationery with different designs or an entire range with a special theme or motif.
Letterheads
Pick plain writing paper as your base. The letterhead can be a ‘garland’ effect in a single row across the top of the paper or a frame for the entire page.
Decide whether the letterhead will have a theme or if it will be purely decorative.
Simple ideas for decorations include:
- A row of fingerprints.
- Printing using the cut end of a carrot, small pieces of fruit or vegetables.
- Use leaves, flowers, shells or pebbles as stencils.
- Freehand designs with crayons and felt pen markers.
- A simple band of collage.
If you are creating a batch of letterheads, make a master copy and photocopy or print the finished design onto sheets of coloured paper. This is equally effective with colour copying or plain black.
Postcards
To make postcards, cut pieces of stiff card to size, this is usually the standard A6 size of 148mm x 105mm.
On the reverse of the card, draw a single line down the centre of the card from the longest sides, to create a section for a message and a separate half for the address and stamp.
Use the same decorative ideas for the letterhead. If it’s part of a set, carry through the theme or motif. You can copy the card designs with a printer if you wish.
A particularly effective design idea for postcards is picture collages of old photographs. Cut and glue them together onto a ‘master postcard’ before making copies for the set.
Envelope Notelets
Try this lovely idea which cleverly combines a notelet with its very own built- in envelope.
Start the project with a square piece of thick paper or thin card. Mark four points that are equal in distance from each other at each centre of the four sides. Using a ruler, carefully mark lines between each point. This will create a central square with four triangular shapes at each edge.
Now complete the notelet by folding along each of the four lines to create four triangular flaps that fold inwards on the central square. You’ll be able to see that there is a space for a message and each of the flaps can be folded down and sealed with a sticker to create the envelope.
If you are giving the notelets as a gift, don’t forget to include a sheet of stickers with your notelets so the lucky recipient can seal their envelopes.
You can decorate the fold over flaps and part of the envelope but leave enough space for personal messages on the notelet itself and on the reverse so an address can be written out clearly.
There’s no end to ideas you can try out on your homemade stationery. Whether you keep the finished items for yourself or plan to give them for a gift, one thing is for certain- making their own stationery will give kids hours of fun.