Making wind chimes is a wonderful craft activity that will engage your child in a creative project which will encourage them to venture into the garden. Wind chimes are intended to be decorative,visually and audibly. Be warned though, they should be a source of calm and reassurance and involving children may result in lots of loud crashing and jangling! Nevertheless, it will give them hours of fun and plenty of options to try out different ideas.
The Base
Every wind chime needs a base. This will be used to suspend the wind chime from a branch or suitable place. It will also anchor the strands which are attached to each of the individual chimes.
Some ideas for wind chime bases are:
- Try twisting branches from the garden together or look out for a suitable branch to suspend the strings from. You could even hang the individual chimes directly onto a living branch. This gives a natural effect.
- Blank CDs or DVDs are good wind chime bases. Attach the strings via the central hole and across the radius of the disk so the chimes are suspended at regular intervals around the circumference. Blank disks are cheap so it doesn’t matter if the children make mistakes and there’s the added attraction that they catch the sun beautifully.
- Another popular choice for wind chime bases are flower pots. They can be used as they are, the terracotta colour is very attractive. The pots can also be decorated with bright paints or adorned with glued on stones, ‘gems’ or shells. Attach the strings by first tying a cord that criss-crosses across the mouth of the pot and up around the sides of the pot. Use the mesh you have created to suspend the strings in a random pattern. The pot is then attached upside down to the branch or the hanging device with the chimes in place.
The Strings
There are a number of different options to try out. Some good ideas are:
- Simple brightly coloured string.
- Fishing line is a really good option, as it’s hard to spot against a backdrop of the foliage and the chimes appear to ‘float’.
- Ribbon is a particularly attractive option, especially if bright jarring colours are selected.
- Use strings threaded with brightly coloured beads for a particularly striking effect. This is a very good way to involve younger children in a craft activity that requires less skill.
The Chimes
The chimes are arguably the most fun part of the wind chime to create. The combination of chimes used will determine the overall effect of the finished item. A particularly enjoyable part of the craft activity is testing how the chimes sound. The children may choose to have a single sound or they could use a combination of materials to create something different. This may also affect the pattern in which the chimes are suspended. Some good chime ideas to try are:
- Spoons. Wooden and metal cutlery can be used and will produce different sounds entirely. If you use wooden spoons, younger children may like to decorate or paint them first.
- Old keys are very good chimes.
- Look out for things like metal buttons or tiny bells that you find on some confectionery and decorative packaging.
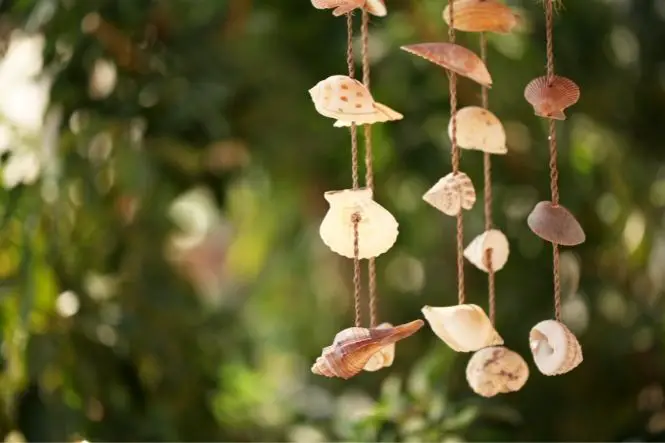
- Shells are beautiful additions to wind chimes. They must be clean and it’s down to adults to make the holes needed to suspend the shells. You can combine the shell chimes with pebbles. This is a wonderful way to turn children into junior beachcombers.
Wind chimes are beautiful trinkets for the garden that will give your children hours of fun. They need to design the chime, collect the materials, engineer the chime and then it’s up to you to stand back and admire.


